
About
Lightweight production-ready face analysis library built on ONNX Runtime.
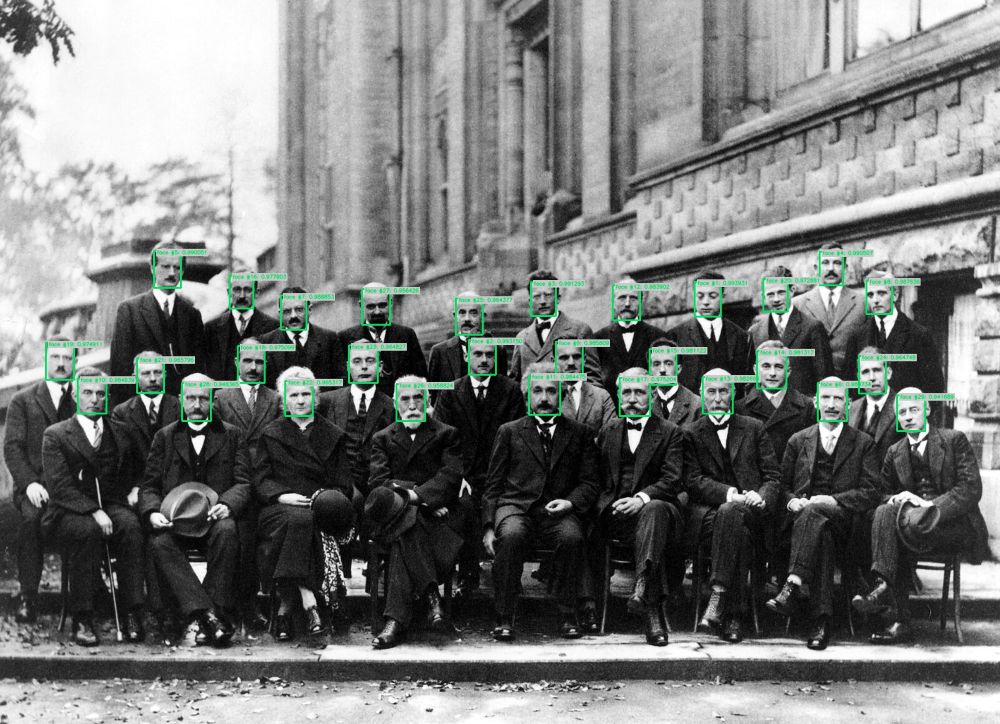
Run inference for multi-face detection using UniFace library. UniFace is a lightweight production-ready face analysis library built on ONNX Runtime, supporting multiple face detection models including RetinaFace, YOLOv5Face, SCRFD, and YOLOv8Face.
This algorithm also includes optional face anonymization capabilities with 5 different blur methods (gaussian, pixelate, blackout, elliptical, median) for privacy protection.
🚀 Use with Ikomia API
1. Install Ikomia API
We strongly recommend using a virtual environment. If you're not sure where to start, we offer a tutorial here.
2. Create your workflow
☀️ Use with Ikomia Studio
Ikomia Studio offers a friendly UI with the same features as the API.
- If you haven't started using Ikomia Studio yet, download and install it from this page.
- For additional guidance on getting started with Ikomia Studio, check out this blog post.
📝 Set algorithm parameters
Detection Parameters:
- model_name (str, default="retinaface"): Face detection model to use. Options: "retinaface", "yolov5face", "scrfd", "yolov8face".
- conf_thres (float, default="0.6"): Object detection confidence threshold.
- nms_thres (float, default="0.4"): Non-maximum suppression threshold.
Anonymization Parameters:
- output_anonymized (bool, default="False"): Enable output of anonymized image with blurred faces.
- blur_method (str, default="pixelate"): Blur method to use. Options: "gaussian", "pixelate", "blackout", "elliptical", "median".
- blur_strength (float, default="3.0"): Blur intensity for gaussian, elliptical, and median methods (range: 1.0-10.0).
- pixel_blocks (int, default="15"): Size of pixelation blocks for pixelate method (range: 1-50).
- margin (int, default="20"): Extra margin around face regions in pixels (range: 0-100).
Note: parameter key and value should be in string format when added to the dictionary.
🔍 Explore algorithm outputs
Every algorithm produces specific outputs, yet they can be explored them the same way using the Ikomia API. For a more in-depth understanding of managing algorithm outputs, please refer to the documentation.
The algorithm outputs:
- Output 0: Original image with detection overlays (graphics)
- Output 1: Detection graphics (bounding boxes)
- Output 2: Anonymized image (only when
output_anonymized=True)
🔧 Face Anonymization Example
Developer

Ikomia
License
MIT License
A short and simple permissive license with conditions only requiring preservation of copyright and license notices. Licensed works, modifications, and larger works may be distributed under different terms and without source code.
| Permissions | Conditions | Limitations |
|---|---|---|
Commercial use | License and copyright notice | Liability |
Modification | Warranty | |
Distribution | ||
Private use |
This is not legal advice: this description is for informational purposes only and does not constitute the license itself. Provided by choosealicense.com.